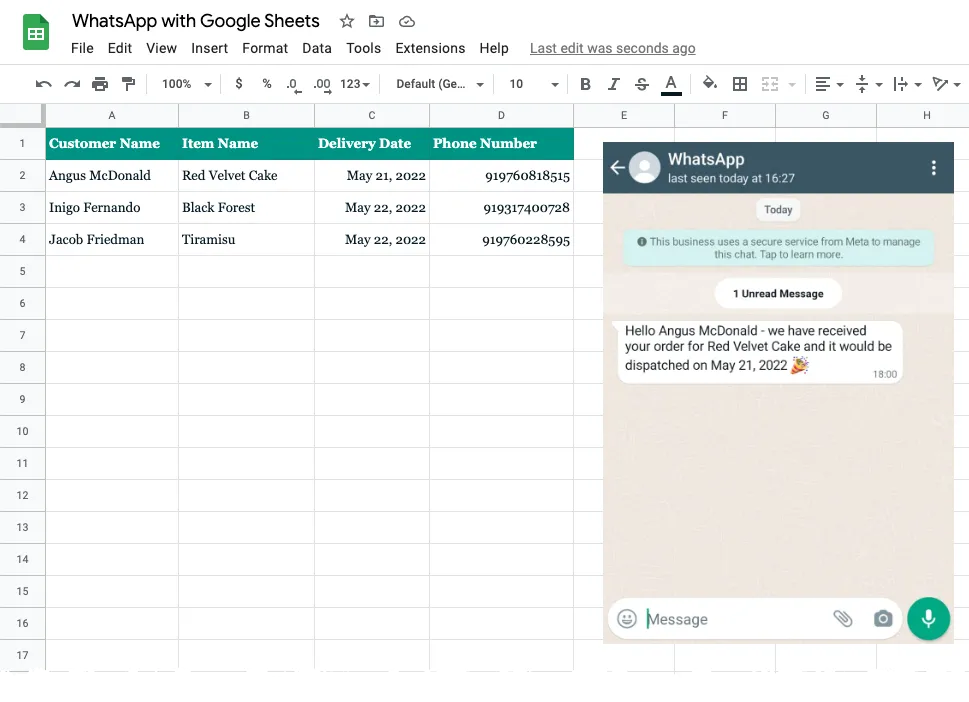

This tutorial describes how you can use the new WhatsApp API with Google Apps Script to send WhatsApp messages from Google Sheets. The same approach would also work for sending WhatsApp messages from Google Forms when new form submissions are received.
Step 1: Create a WhatsApp App
Go to developers.facebook.com and click the Create App button to create a new app that we’ll use for sending WhatsApp messages.
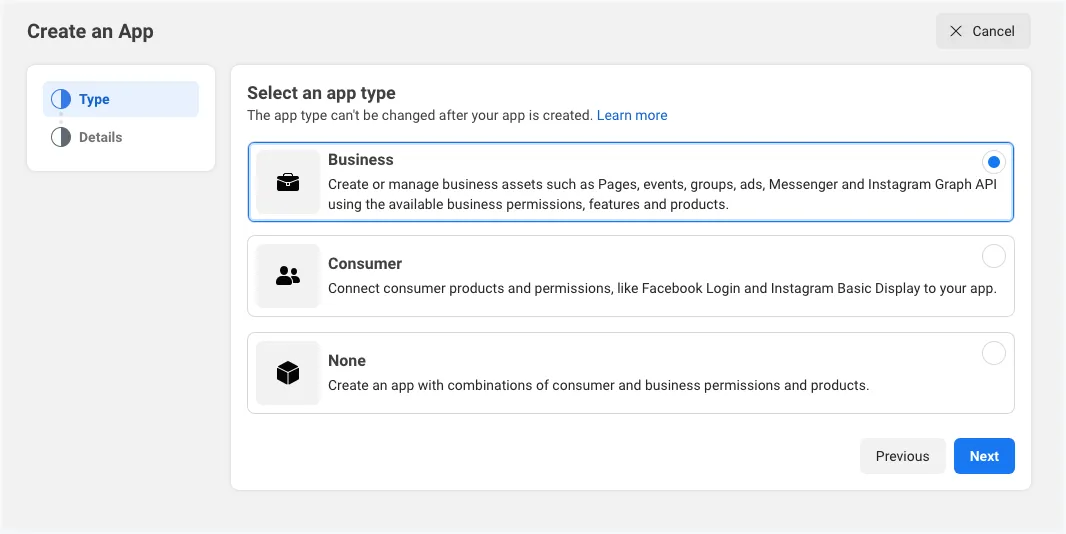
Select Business as the app type.
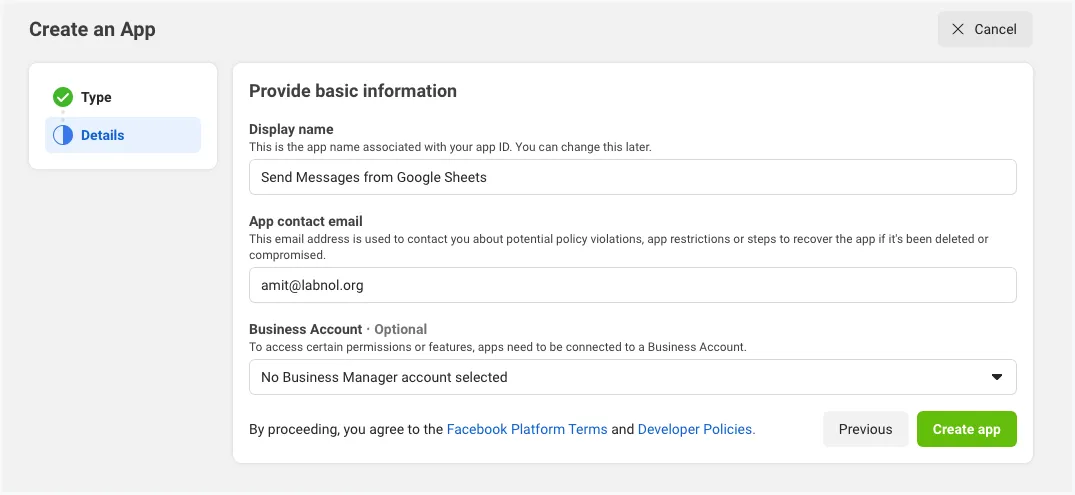
Give your app a descriptive name (do not use any Facebook trademarks like WhatsApp or Facebook in the app name) and click the Create App button to create the app.
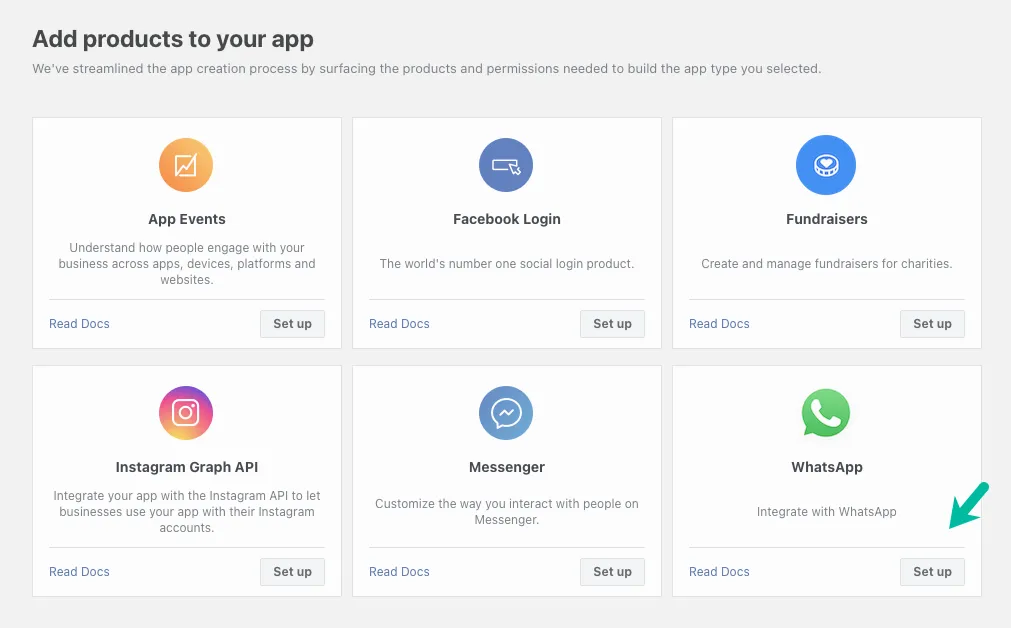
Once the app has been created, click the WhatsApp button on the next screen to add WhatsApp sending capabilities to your app.
On the next screen, you will be required to link your WhatsApp app to your Facebook business account. You will also have the option to create a new business account if you don’t have one yet.
Step 2: Add Recipient’s phone number
Facebook will provide you with a test WhatsApp phone number that will be default sending address of your app. For recipients, you’ll have the option to add a maximum of 5 phone numbers during the development phase without having to make any payment.
Your WhatsApp app will provide you with a temporary access token that will be valid for 23 hours. Make a note of this token as we’ll need it in a later step.
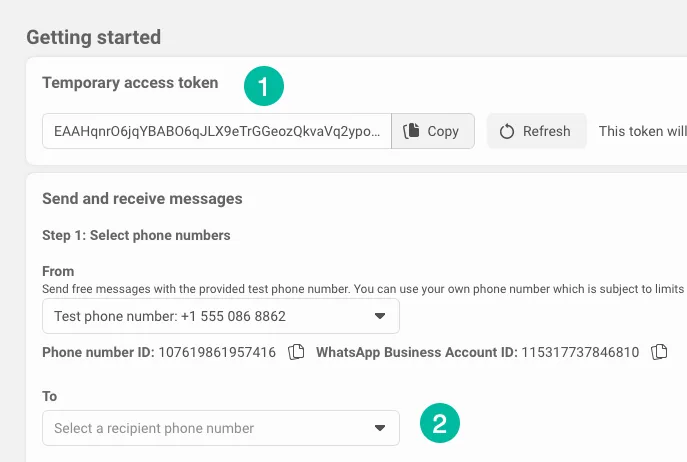
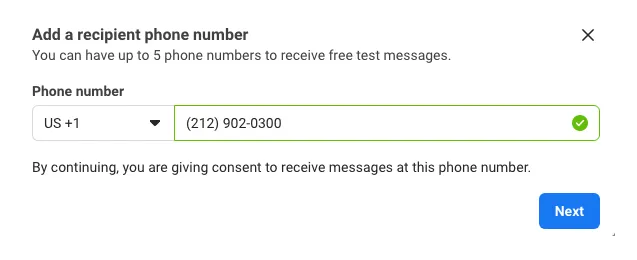
Next, click the Recipient Phone Number dropdown to add up to 5 different WhatsApp phone numbers to your app. You’ll receive a verification code on the added numbers and you’ll be able to send WhatsApp messages to only numbers that have been verified with the code.
Step 3: Create WhatsApp Message Template
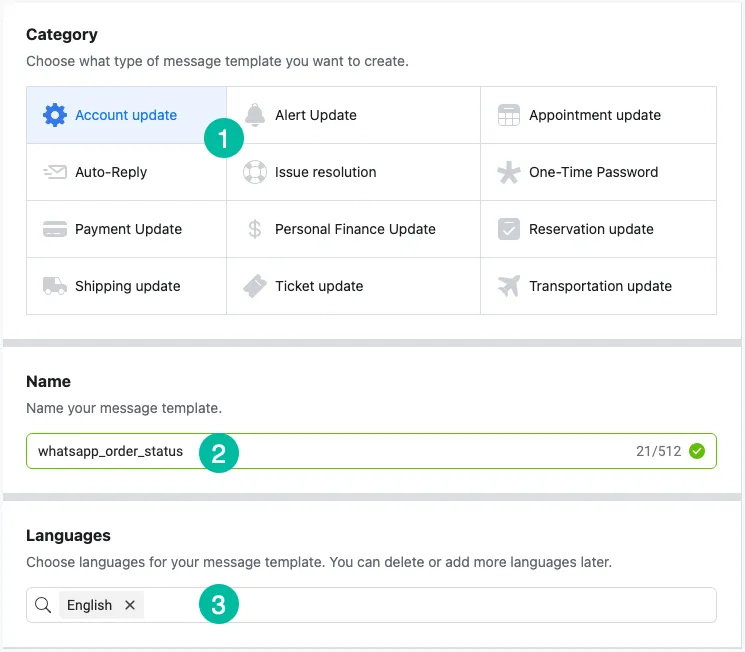
Switch to the template manager and create a new WhatsApp message template.
For this example, we’ll choose the category as Account Update and give a unique name for your message template. For languages, we’ll choose English for which the code language is en. If you use another language, make a note of the code language as it is required for sending messages.
Write the Personalized Message
We are using variable parameters in the message and these will be replaced with the actual values from the Google Sheet. It is very similar to markers that you may have used inside Mail Merge and Document Studio with a small difference that these are positional markers and not named markers.
Here’s our message template where variables {{1}} and {{2}} are for customer name and item name respectively.

It may take up to a minute for WhatsApp to approve your new message template.
Step 4: Send WhatsApp Messages
Now that all our configuration on the Facebook / WhatsApp side is complete, let’s work on the Google Sheet that will send these personalized WhatsApp messages in an automated manner.
Click here to copy the WhatsApp Sheet to your own Google account.
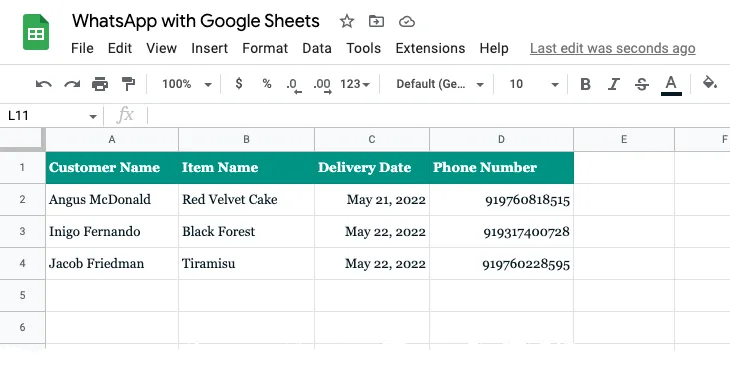
Next, add the phone numbers (with country code) in the Phone number column of the Google Sheet. You should only add numbers that you have verified with your test WhatsApp account in the previous step.
Then go to the Extension menu and choose Apps Script to open the underlying script. Replace WHATSAPP_ACCESS_TOKEN and WHATSAPP_TEMPLATE_NAME with the values that you have copied in the previous steps.
Click the Run button inside the Apps Script editor and it should instantly send the WhatsApp message to your listed phone numbers.
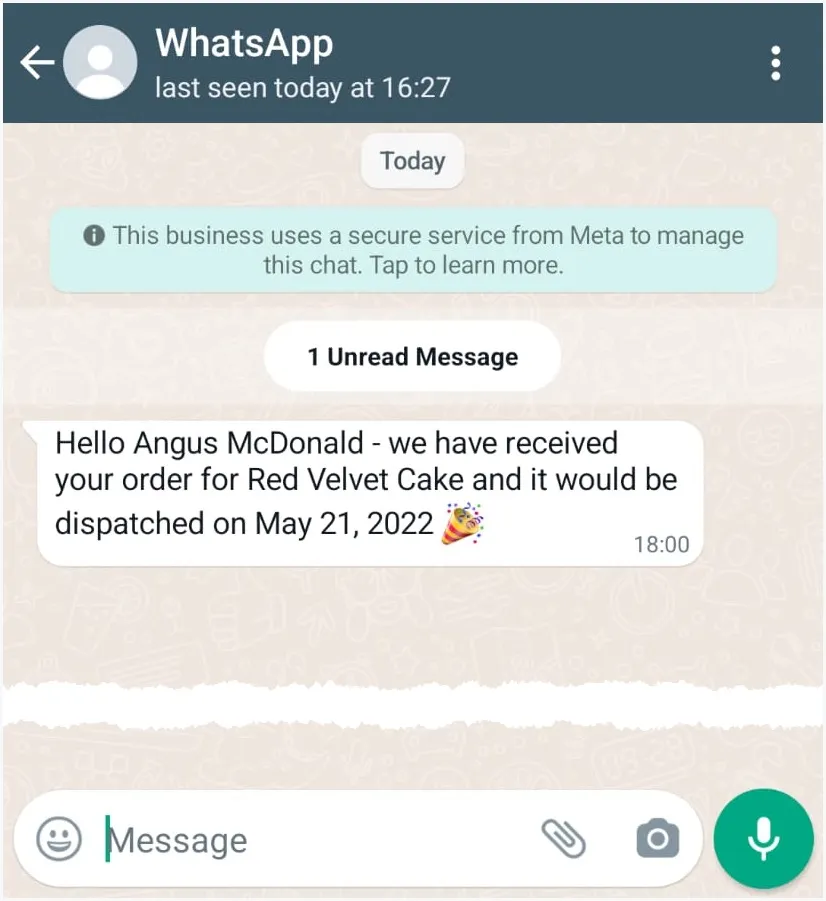
And what you have below is the actual WhatsApp message sent by the WhatsApp API replacing the variable markers in the template with actual values from Google Sheets.
The Technical Details
How WhatsApp API works with Google Apps Script
The Google Apps Script connects to Google Sheets and retrieves the details of customers, including phone numbers, that are to be sent messages through WhatsApp.
// Get data from Google Sheets
// for sending messages through WhatsApp
const getSheetData_ = () => {
  const sheet = SpreadsheetApp.getActiveSheet();
  const [header, ...rows] = sheet.getDataRange().getDisplayValues();
  const data = [];
  rows.forEach((row) => {
    const recipient = {};
    header.forEach((title, column) => {
      recipientHow to Send WhatsApp Messages from Google Sheets using the WhatsApp API = row[column];
    });
    data.push(recipient);
  });
  return data;
};
Next, the script iterates through each row of the sheet and sends a WhatsApp message by invoking the WhatsApp Cloud API with the UrlFetch service.
// Send Message with WhatsApp Cloud API

const sendMessage_ = (e) => {
  const apiUrl = 'https://graph.facebook.com/v13.0/114746974570888/messages';
  const request = UrlFetchApp.fetch(apiUrl, {
    muteHttpExceptions: true,
    method: 'POST',
    headers: {
      Authorization: `Bearer ${WHATSAPP_ACCESS_TOKEN}`,
      'Content-Type': 'application/json'
    },
    payload: JSON.stringify({
      type: 'template',
      messaging_product: 'whatsapp',
      to: e.recipient_number,
      template: {
        name: WHATSAPP_TEMPLATE_NAME,
        language: { code: LANGUAGE_CODE },
        components: [
          {
            type: 'body',
            parameters: [
              { type: 'text', text: e.customer_name },
              { type: 'text', text: e.item_name },
              { type: 'text', text: e.delivery_date }
            ]
          }
        ]
      }
    })
  });

  const { error } = JSON.parse(request);

  if (error) {
    Logger.log(`😞 ${error}`);
  } else {
    Logger.log(`Message sent to ${recipient_number}`);
  }
};

const main = () => {
  getSheetData_().forEach((row) => {
    const status = sendMessage_({
      recipient_number: row['Phone Number'].replace(/[^\d]/g, ''),
      customer_name: row['Customer Name'],
      item_name: row['Item Name'],
      delivery_date: row['Delivery Date']
    });
  });
};
Also see: Automate Workflows with Google Sheets
Author
prakhar@affmantra.com
Related Posts

How to Add Speech Recognition to your Website
Table of Contents 1. Add Voice Recognition to your Website Open the Google website on your desktop computer and you’ll find a...
Read out all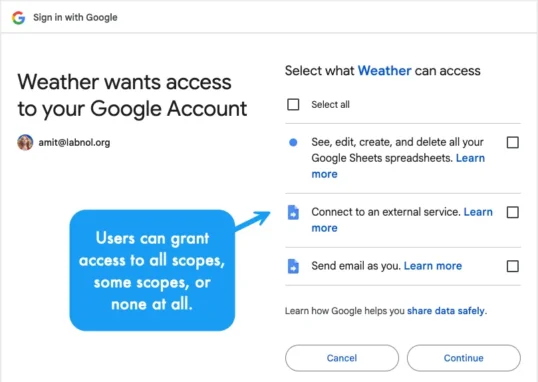
How to Handle OAuth Permissions in Google Add-ons
- 0
- 714 words
Table of Contents 1. How to Check for Required OAuth Scopes 1.1 The “Authorization Catch-22” Problem 1.2 How to Reset the Permissions...
Read out all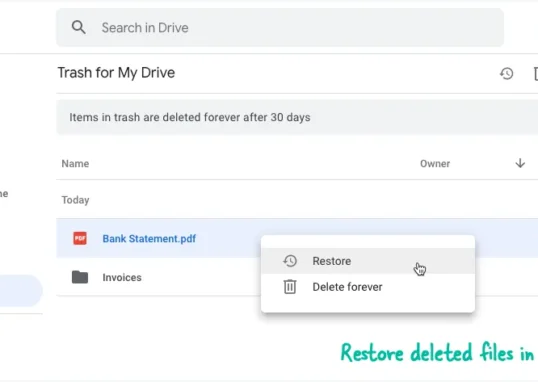
How to Recover Permanently Deleted Files and Folders in Google Drive
- 0
- 326 words
Table of Contents When you delete any file or folder in your Google Drive, it is moved to the trash folder. The...
Read out all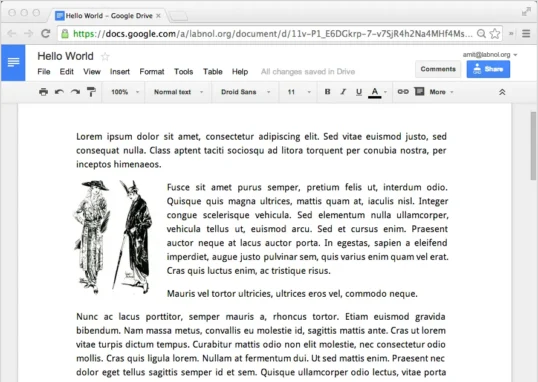
Simple URL Tricks for Google Drive You Should Know
- 0
- 374 words
Table of Contents 1. Google Drive URL Tricks 1.1 Google Drive Web Viewer 1.2 Reader Mode for Google Drive Files 1.3 Embed...
Read out all
How to Extract URLs from HYPERLINK Function in Google Sheets
- 0
- 201 words
The HYPERLINK formula of Google Sheets lets you insert hyperlinks into your spreadsheets. The function takes two arguments: The full URL of...
Read out all
Find and Remove Inactive Users in your Google Workspace Domain
- 0
- 388 words
Table of Contents 1. Find the inactive users in Google Workspace domain You can use Google Apps Script to find all the...
Read out all